In layman’s terms, Wireshark is a potent tool that helps cybersecurity analysts to capture and inspect network traffic in real-time.
Suppose there’s a malicious attack attempt on an organization network and the intrusion detection system (IDS) flags a suspicious event. In such a crucial event, the cybersecurity incident response team needs to locate and stop the malicious intrusion.
In such a scenario, cybersecurity analysts can leverage the Wireshark packet capture tool to capture packets related to the incident. Wireshark can help the analysts to gain insights into the nature of the attack and can also help to determine the origin, location, method used, and the potential adverse impacts of the malicious incident.
Example: A sudden increase in network traffic to a specific server prompts investigation. Wireshark reveals an unusual pattern of traffic, indicating a possible DDoS attack. Analysing the captured packets helps in understanding the attack vectors and devising appropriate countermeasures.
Detection of Malicious Activity:
Filter by Source or Destination IP:
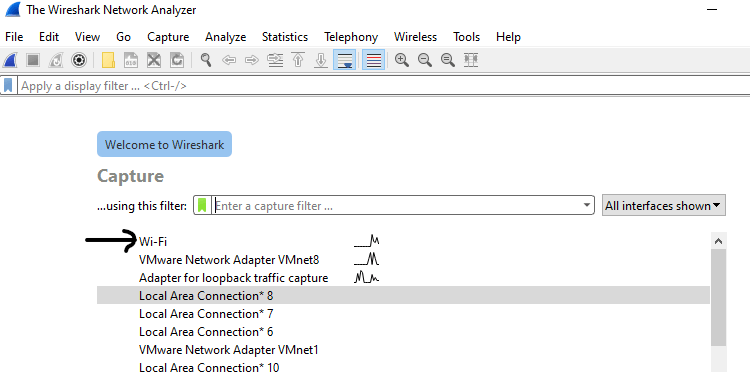
- Open the Wireshark tool on your PC and start a live capture or open a saved capture file. You either start a Wi-Fi or Wired packet capture based on network availability.
- In the display filter bar (like a search bar – also shown in the below screenshots), enter – ip.src == [IP Address] or ip.dst == [IP Address] to filter packets involving a specific IP address.
- The above-listed filter will isolate traffic to or from the potentially compromised host.
In my Wireshark IP filter tutorial, you can see that I’m trying to filter my Smart TV traffic and isolate it from other network traffic. For that, I have to enter the device’s IP address in the filter, which is 40.74.219.49.
So to isolate my Smart TV traffic from the rest I’ve to use this complete filter – ip.src == 40.74.219.49 and press enter.
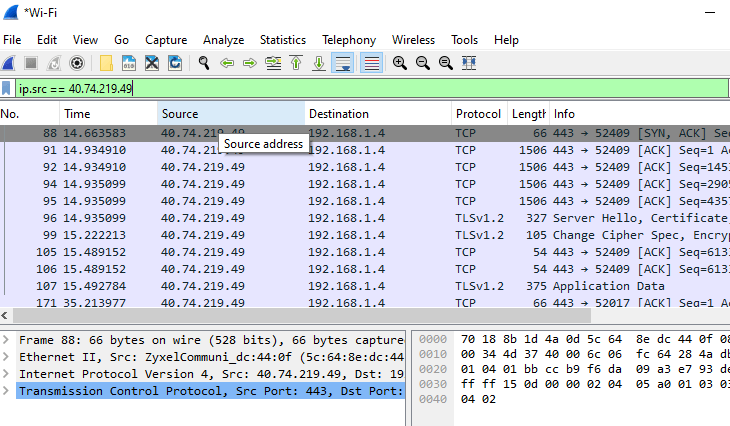
Now in the below screenshot, you can see that Wireshark now only shows and captures traffic from the IP – 40.74.219.49.
You can also use multiple IP filters in one command to capture data between only the particular source and destination.
For example – I have a smart TV and an Android phone and I am controlling my TV using the Android TV or Google Home app then you can filter the traffic between these two devices.
Here’s an example of how you can set up a filter for capturing traffic between a smart TV and an Android phone:
ip.addr == [Smart TV IP] and ip.addr == [Android Phone IP]
ip.addr == 40.74.219.49 and ip.addr == 192.168.1.4
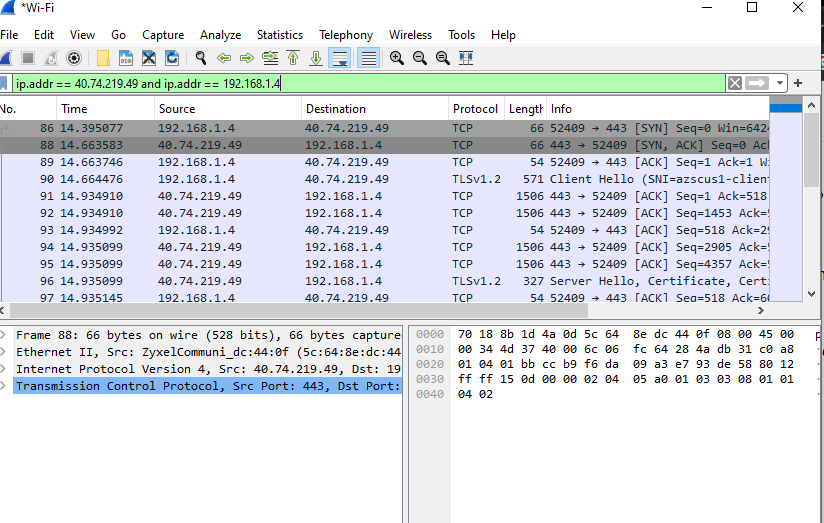
So I’ve entered both the source and destination addresses that I want to capture. The above filter will capture the traffic between my TV and my Android phone.
So, using filters like these you can isolate malicious packets and investigate any breaches or malicious activities with more precision and effectiveness.
Focus on Suspicious Protocols:
Narrow down the analysis by focusing on specific protocols associated with the incident. For example, tcp or udp for network-level attacks.
You ca always use a filter like tcp.port == [Port Number] to analyze traffic related to a specific port.
Identify Unusual Traffic Patterns:
Cybersecurity analysts need to look for unusual patterns in the captured packets.
For example, if you see an unusually high number of connection attempts or abnormal data transfer rates, then it can be detrimental to your organization’s network and you should conduct a thorough investigation and find the root cause of any intricacies that arise.
As a cybersecurity intern, you should also know how to utilize filters like – tcp.flags to identify specific flags set in TCP packets, indicating potential malicious activities.
Forensic Analysis of Incidents:
Capture Packets During the Incident:
- Start Wireshark capture as soon as an incident is detected to capture packets during the relevant timeframe.
- Use the display filter frame.time >= “Start Time” and frame.time <= “End Time” to filter packets within the incident window.
Follow the Attack Timeline:
- Analyze packet timestamps (frame.time) to reconstruct the sequence of events.
- Use filters like ip.addr == [IP Address] to track the activities of a specific host during the incident.
Examine Payload for Insights:
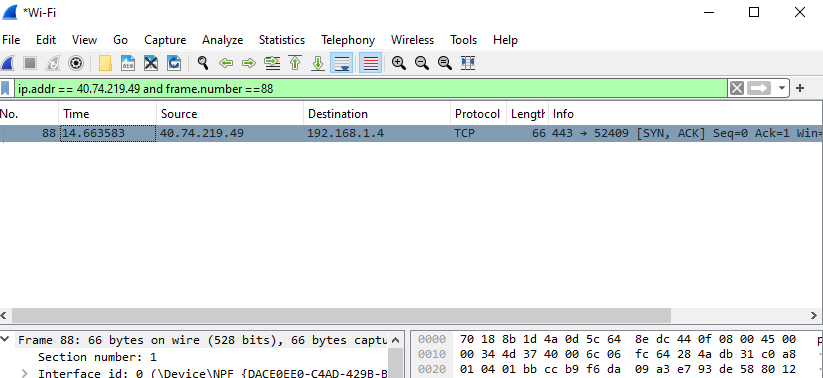
- To view the payload of a packet, use a filter like frame.number == [Packet Number].
- Inspect the content for any malicious commands, data exfiltration, or other suspicious activities.
Identification of Malware Communication:
Steps:
Capture Traffic from the Infected Device:
- Start a Wireshark capture on the network interface connected to the infected device.
- Filter packets using ip.addr == [Infected IP Address] to isolate the device’s communication.
Identify Unusual Communication Patterns:
- Yo also need to look for communication with external IP addresses, which might indicate command and control servers.
- Use filters like ip.dst == [External IP Address] to focus on outgoing traffic to a specific IP.
Analyze Payload for Malicious Content:
- Use filters like tcp.port == [Port Number] or udp.port == [Port Number] to identify the protocol associated with the communication.
- Examine the payload of relevant packets for any signs of malware activity.
Best Practices for Incident Response with Wireshark:
Prompt Packet Capture:
- Always start Wireshark captures promptly when an incident is detected.
- As a cybersecurity professional, you need to use the filter ip.addr == [Device IP Address] to focus on the relevant device, which is the most basic type of filter and frequently comes in usage to sequestrate from the rest of the network traffic.
Use of Filters:
- You can employ various filters to narrow down the scope of analysis – like the multiple IP filter which I used above in the article to separate the crucial traffic data from the rest of the traffic.
- You can also use filters like [Keyword] for keyword-based searches.
Collaboration with Other Tools:
One thing I’ve learned the hard way is that Integrating Wireshark with other security tools to enhance incident response is a need of an hour – it just simplifies and enhances your response time.
Analysts also need to know that how they can leverage filters compatible with the data provided by these tools for a unified analysis.