Security from unauthorized access and online privacy of your data/assets is a crucial and critical aspect of technology. As a cybersecurity professional, I understand the seriousness of hacking and its vast complications, which can arise due to a potential data leak or cyber attack.
However, a general Windows user does not really comprehend the volatile nature of cyberattacks, which inadvertently, most of the time, results in data leaks. These leaks can further lead to social hijacking, ransom attacks, and many more unprecedented personal privacy attacks.
There are a vast number of online safety techniques and software available in the market to automate all the security tasks of your Windows PC. From securing your privacy to keeping all your passwords safe from brute-force attacks, you can easily find an alternative – some are free, while others require payment.
I can name a number of antivirus software which you can use to secure your windows PC like: Bitdefender, Norton, Kaspersky, McAfee, and Avast. Similarly also use security software like Malwarebytes, ZoneAlarm, Avira, ESET to secure their PCs.
All these software have a freemium subscription model, which basically lets you use the software with some restricted capabilities. And if you want to use the software to their full potential, then you have to pay for a monthly, quarterly, or yearly subscription, which starts from $5 per month to $29/$30 per month.
But on Forti defend, I always try to find an alternative, of course without compromising the quality. I’ve been using Windows for the last 15-16 years, from Windows XP to Windows 11. Although Windows didn’t have the best built-in security functions in the past, from Windows 8 onwards, Microsoft has actually taken a big stride with Windows Defender and has exponentially improved the safety and antivirus capabilities of Windows Security.
If you are a typical user who uses a laptop for social media, college projects, media, or data saving, then I would recommend enabling Windows Security on your Windows 11 or 10 PC. It is completely free and comes with all the essential features.
From virus and threat protection to virus scan and ransomware to live virus protection – Windows built-in security is well-equipped with all the essential threat protection tools.
Follow the steps below to enable Free Antivirus Capability on your Windows 11 or Windows 10 PC
You can also follow this youtube video link to follow the step-by-step video instructions:
Open and Enable Windows Security
Press Windows button on your laptop or PC and type “Windows Security” in the search bar , which is next to Windows button.

Press enter, to open Windows defender application settings.
You’ll see “Security at a glance” dashboard with all the virus and ransomware settings.
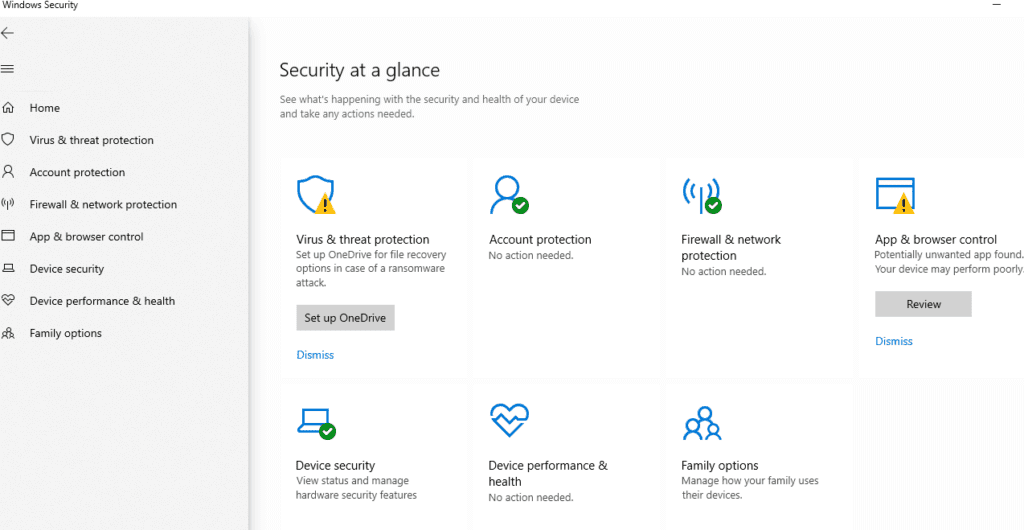
If Windows defender is Turned off, you’ll see a turn on option. Otherwise, a normal dashboard would appear with all the virus protection settings.
Turn on virus and Threat protection Under Windows defender
It is really easy to protect your device against threats using Windows security threat protection capabilities.
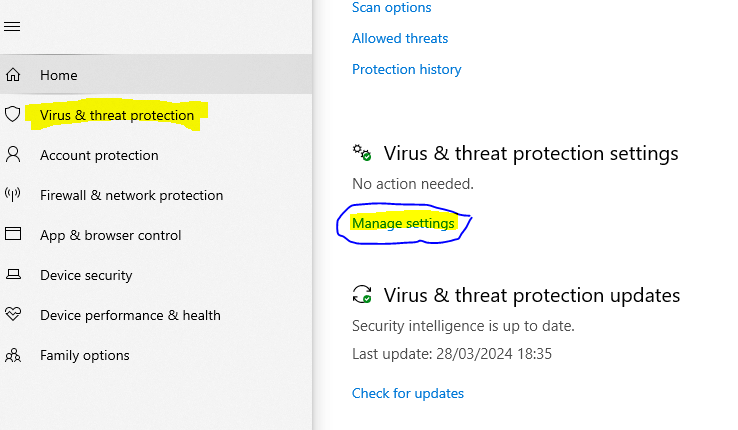
On the left-hand side, click on ‘Virus & threat protection.’

Here, you’ll see a number of options like: Current threats, scan options, protection history, ransomware protection setting and updates.
Under, Virus & threat protection, click Manage settings and turn on all the virus protection features.
You can also check the screenshots.
Enable Real-time protection, Cloud-delivered protection, Automatic Sample submission, and Tamper protection.
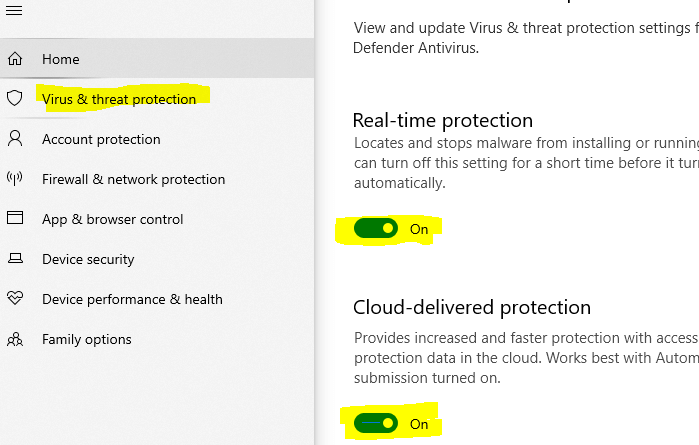
All these are very important and play a critical part to secure your data and privacy on your windows device. So, make sure all of the above indicated threat detection capabilities are turned on.
Scan Your Windows PC for Virus and other Vulnerabilities
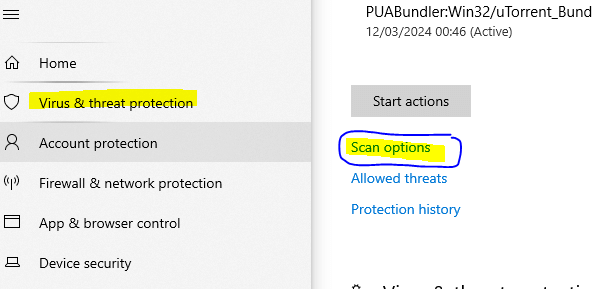
Click on ‘Virus & threat protection on the left side menu then scroll down.
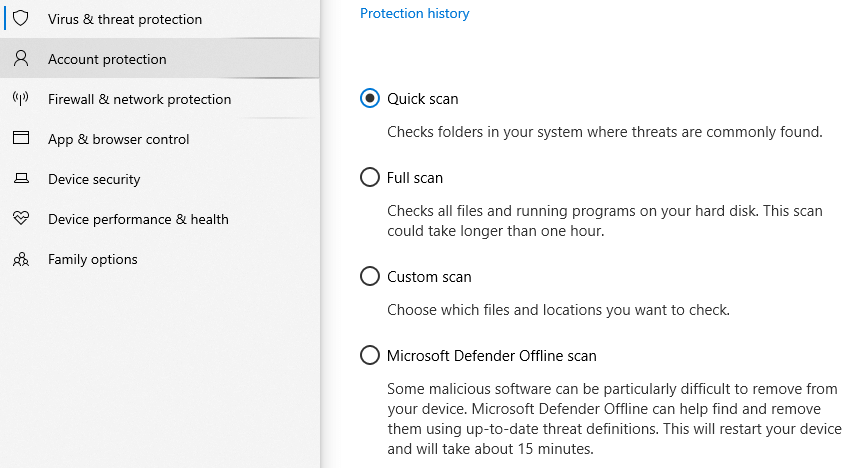
Under Current threats section, click on ‘Scan options.’ You can choose between quick scan, full scan or custom scan.
You can choose the Full scan option if you want to check all files and installed software programs. Keep in mind that the full scan may take over an hour depending on the file size and number of software installed.
Delete Virus threats from Windows PC
After the scan ends Windows security will list all the threats and vulnerabilities under Current threats section.
Windows security also displays the severity of threat with low or high risk thresh hold.
Windows security automatically blocks and removes software /files with high level of threat severity.
Files and software with low level protection threats are shown under virus and threat section which a user can manually block or remove, as shown in the screenshot.
Turn on Ransomware Protection
On the left-hand side, click on ‘Virus & threat protection.’ Scroll down to Ransomware protection and click on ‘Manage ransomware protection.’
Enable ‘controlled folder access‘ to protect folders and files from unauthorized changes to data on your Windows PC.
I also recommend users to ‘Set Up OneDrive’ account for file recovery options in case of a ransomware attack.