Unused applications on mac take a lot of Space. So, if you are not using an app regularly and you don’t need that app in the future, then you must uninstall or delete that app from your Mac OS.
The below method deletes, uninstalls and clears apps and stored data from Mac, MacBook Air, MacBook Pro and Mac desktops (iMac).
Both MacBook Pro and macBook Air come with SSD storage disks which cost double the price of a traditional Hard disk’s and also come with limited storage capacity. Since, these MacBooks come with limited storage capacity it is always wise to sort and always clean your SSD storage by deleting unused files and uninstalling unnecessary applications.
Deleting or uninstalling apps on MacBook Air, macBook Pro and on iMac is pretty easy. you just have to drag and drop the App (you want to uninstall or delete) in to the trash. And then empty the trash.
But most of the Mac OS users do not that they also have to clear and delete all the stored data on their Mac which usually remains on the SSD storage even after the app is uninstalled or deleted.
So, for complete deletion and un-installation of any app on your Mac device you have to search the files stored in the Finder folders and delete the application data.
If you see the “Other” folder under MacBook’s Storage system then you should purge the unused files to free up the space. There might be number of files that are just sitting on your Mac storage and slowing down your MacBook Air or MacBook Pro.
If your macBook Startup process is Slow and you are seeing number of notifications from apps that you have uninstalled then you must use the below method to completely un-install and delete apps and their data from the Mac OS (Big Sur, High Sierra and more).
This method will also take care of unwanted app notifications and annoying background running apps.
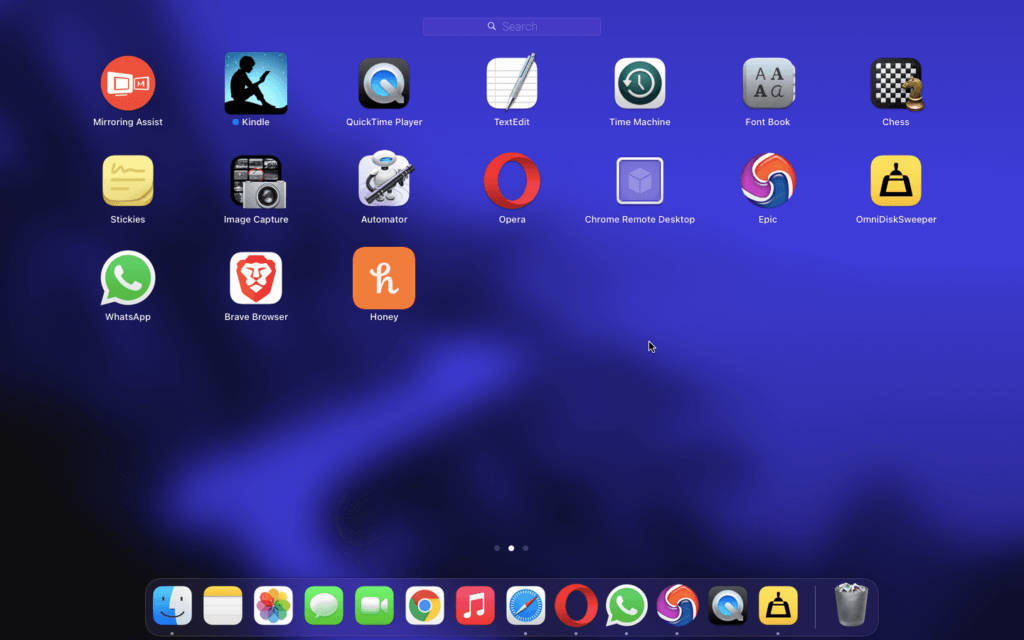
Uninstall apps on Mac Using Launchpad
This is one of the easiest way to delete and remove applications from your Mac.
- Just open the Launchpad on your Mac from the Dock or you can also pinch close your Thumb and three fingers to open the Launchpad.
- Now just press and hold the Option or alt key on your Mac
- Apps will start to start to jiggle and you will see a X sign. Click on the sign and your apps will be deleted or uninstalled from the Mac.
- or you can also just drag and drop the app in to the trash can and it will be removed and completely un-installed from your mac Os.
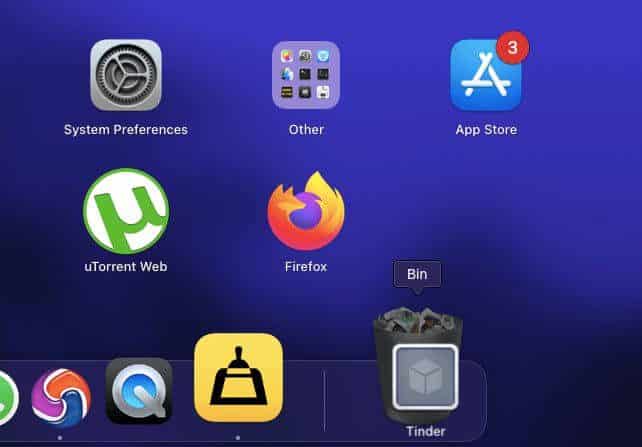
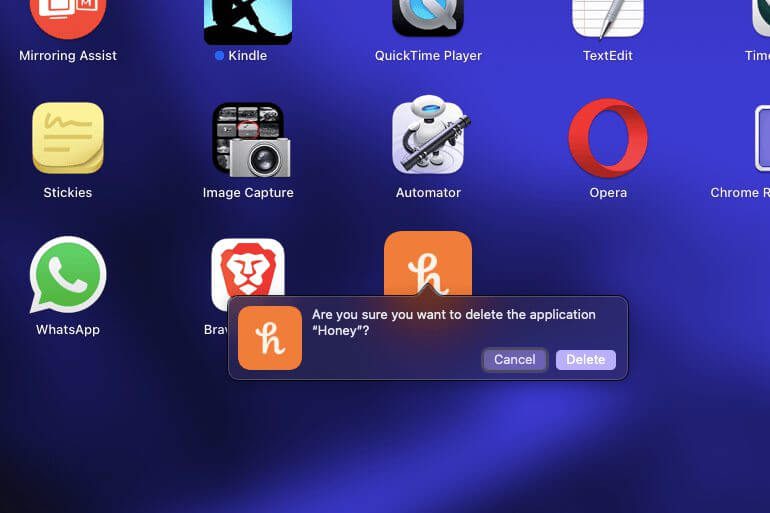
Don’t forget to empty the trash can.
Uninstall or Delete programs on Mac Using Finder
The second method is more traditional and he oldest:
- Open the Finder from the dock.
- From the left pane, Click on Applications
- Now Tap on the app (Which you want to remove or uninstall) by clicking with two fingers and then select Move to trash or
- you can also drag the app into the trash can directly
- This will delete and remove the program from your Mac OS.

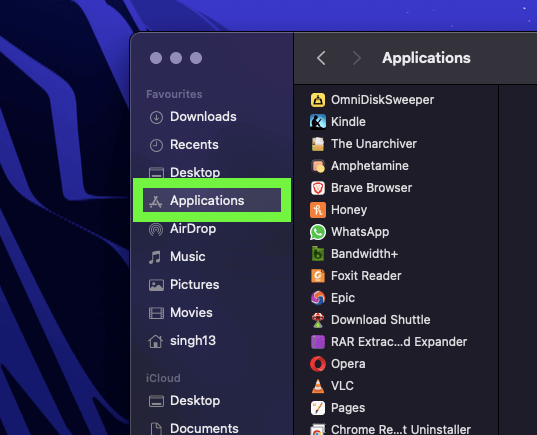
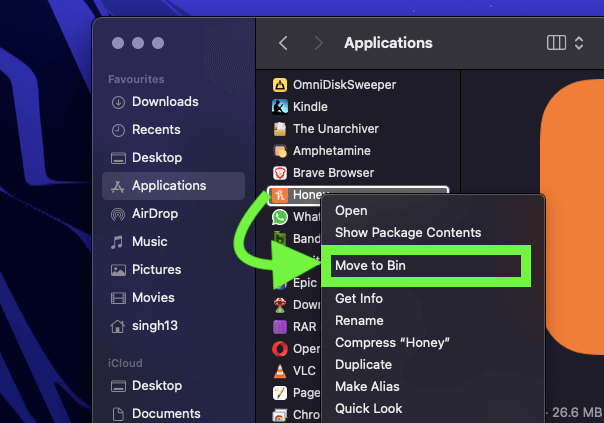
Now, You have deleted the application or ay program from your Mac. But now follow the below step to completely uninstall and remove any stored data on your Mac.
Clear, delete and get rid of other Storage on mac
For that, We have to use OmniDiskSweeper.
OmniDiskSweeper cleans, removes any unwanted files which are sitting on your Mac storage. Sometimes when you delete apps or uninstall software programs from your Mac, the data doesn’t get deleted with them and remains stored on your Mac.
That’s the reason when you open up the Storage settings and see the Other folder on your mac with big application data and large program files.
To completely uninstall and delete any app or program from your Mac with data follow the below steps.
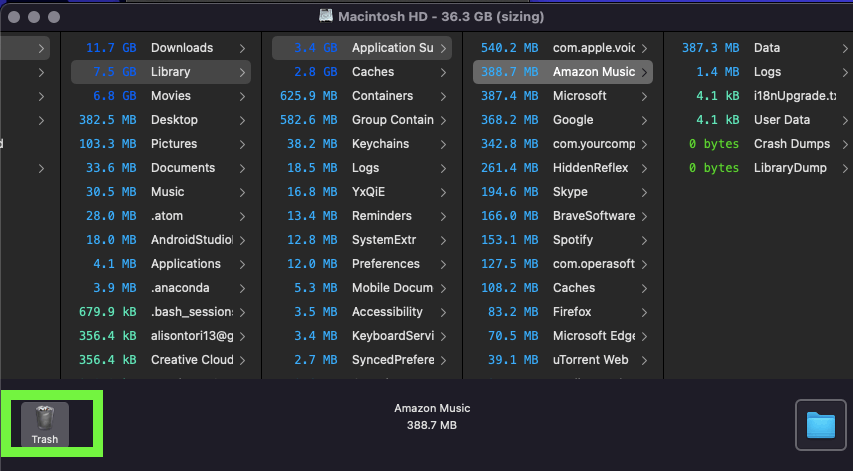
- Install OmniDiskSweeper
- Open the application.
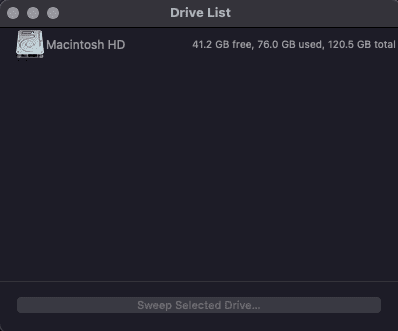
- It will show you the available Storage devices on the mac
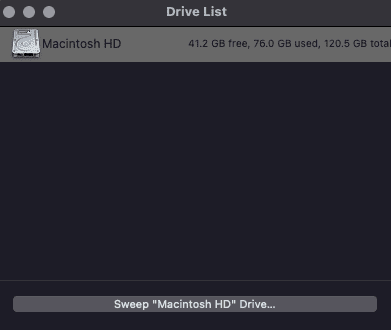
- Click on the Macintosh HD
- And, then click on Sweep “Macintosh HD”
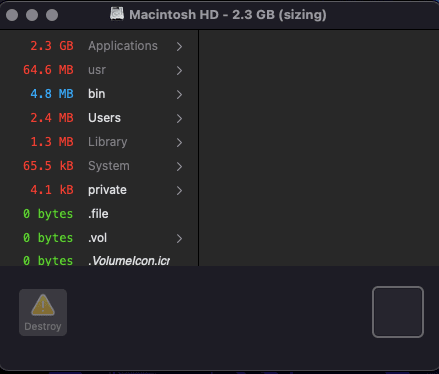
- A new window will open with the detailed storage information of each directory on your Mac.
- Now you have to be really careful here:
- System and Private folder should be handed carefully.
Look for these folders: Users > Library >. Application or Application Support
and delete the stored data files that you don’t need.
So i have now shown you in detail that how can you delete, remove and uninstall any app or program on your Mac with stored left behind files.
If you face any problem or still not understanding the OmniDiskSweeper tutorial then just comment down below and I will reach out to you.
Importance of Secure Deletion:
When discussing the importance of securely deleting apps on a Mac from a cybersecurity standpoint, emphasize the following:
- Data Privacy Concerns: Highlight the sensitive information apps might store and how improper removal can lead to data leaks or privacy breaches.
- Vulnerability Exposure: Explain how leftover app files could create security vulnerabilities, potentially exploited by cyber threats.
- Preventing Unauthorized Access: Stress the significance of removing apps properly to prevent unauthorized access to personal or confidential data.
Highlighting Risks:
- Residual Files: Explain the risks associated with leaving behind residual files or data after an app is deleted, potentially accessible by malicious entities.
- Security Vulnerabilities: Discuss how incomplete app removal might create vulnerabilities, leaving the system open to exploitation or malware attacks.
- Data Breach Potential: Illustrate scenarios where improperly deleted apps could lead to data breaches or compromise sensitive information.
Tools and Best Practices:
- Recommended Tools: Suggest reliable uninstaller applications or built-in macOS utilities designed to thoroughly remove apps and associated files.
- Best Practices: Share a set of best practices users should follow when uninstalling apps, such as checking for associated files, using uninstallation tools, and regularly reviewing installed applications for security purposes.
- Data Backup: Emphasize the importance of backing up critical data before uninstalling apps to prevent accidental data loss during the removal process.


